
What Is the Lifeguard Brick Test and How to Prepare


Becoming a lifeguard is an exciting and gratifying job for water lovers and avid swimmers. Working as a lifeguard gives you the chance to sit out in the sun and hang out by the water all day. It also allows you to help people by either acting as an instructor and teaching them how to swim or by saving them in an emergency.
Every lifeguard shows up to their shift hoping to avoid water emergencies, but because accidents are always a possibility, you have to be ready in case they do occur. As a lifeguard, you are responsible for doing everything you can to assist swimmers who may need your help, so making sure you are ready to perform these duties is essential in becoming a lifeguard.
What Is the Lifeguard Brick Test?
The lifeguard brick test is required to become certified and ensure that you are ready to take on the lifeguard role. A dive brick or lifeguard training brick, often used for strength and rescue training, is a ten-pound steel mass covered with hard rubber designed for use in the pool without harming pool sides or bottoms.
Lifeguard training requires you to be able to retrieve and swim with this weight. More specifically, to successfully complete the lifeguard brick test, you must begin out of the water at one end of the pool. You must swim the entire length of the pool, pick up the brick from the bottom of the pool and swim back to your starting position. As you swim back with the brick, you must have two hands on the brick and keep the brick on the surface of the water.
In this scenario, the diving brick represents a drowning victim at the bottom of a pool, and this exercise proves that you can successfully save them.
How to Prepare for the Lifeguard Brick Test
With proper practice, training and the drive to pass your certification, you will be ready for this test in no time. The simplest way to prepare for the test is to break it down into sections and practice each part individually before attempting the test in its entirety. The test best breaks down into four steps:
1. Locate the Brick
Start preparing for the brick test by practicing the 20-yard swim without goggles. Although this may already be easy for you, do not skip practicing this step. Try out different techniques and strokes and see which one gets you closest to the brick the fastest and allows you to see the brick easily and clearly.
The more efficient you are in this beginning step, the more prepared you are to take on the rest of the test. Also, note that efficiency does not necessarily mean the quickest. Even though it is important to make the rescue in a timely manner, as it is a timed test, make sure you do not use all your strength for the swimming portion of the test because you will need more energy later when you retrieve the brick.
2. Retrieve the Brick
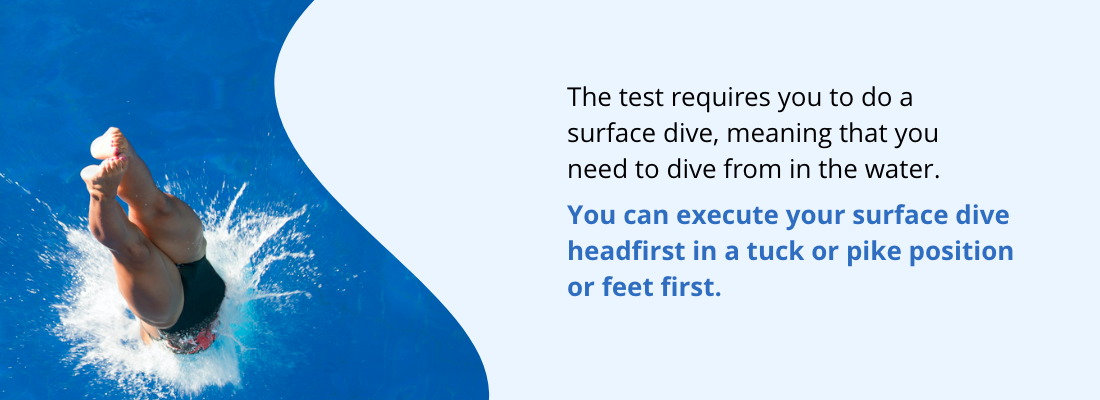
The second step to prepare for is diving and getting the brick. The test requires you to do a surface dive, meaning that you need to dive from in the water. You can execute your surface dive headfirst in a tuck or pike position or feet first. Try each of these techniques and figure out which works best for you. Practice where you need to position yourself to keep the brick in front of you, allowing you to reach it without having to do much searching after you initially locate it.
3. Swim the Brick Back to the Start
After you retrieve the brick, your next focus is how you plan to bring it back to your starting position. This step may be the most important part of the test because you need to remember to keep two hands on the brick and make sure you keep it above the water. Figure out the best kick for you to use that will get you to the edge of the pool quickly.
Another thing to consider is where to hold the brick. Some people find it easiest to rest it up the upper part of your chest, while others move it a little lower, still keeping it afloat.
4. Exit the Water Without Using the Ladder
Most of the time, the most convenient way to get out of the pool is by using the steps or ladder. The test, however, requires you to get out of the water without assistance. Some people find it easiest to get out backward, and others like to face the wall and push themselves up, bringing their feet onto the side of the pool. Decide which option is easiest for you and do that during the test.
Doing each of these steps individually is crucial because it will help give you the confidence you need to complete the test successfully. Once you know that you can do each step, practice them together and time yourself. Figure out what steps you need to complete the fastest and where you need to exert most of your energy. Experiment with different combinations of speed and energy exertion until you find the most effective one for you.
Tips for Surviving the Lifeguard Brick Test
Even after breaking the test down into various steps and practicing them individually, it still may be difficult for you to complete the lifeguard brick test in the allotted time. Here are a few tips on how to prepare for and complete the lifeguard brick test.
1. Take Your Time
Even though it is a timed test and in a real-life situation you would want to get to the victim as soon as possible, you need to make sure you save enough energy for when you will need it the most later in the test.
2. Keep the Brick in Front
When you flip over to dive to the bottom of the pool, you want the brick to be directly under you where you can reach it. The best way to ensure that you dive with the brick positioned there is by keeping it slightly in front of you so that you will land right on it after the dive.
3. Get to the Surface Quickly
Whether you decide to surface dive headfirst to reach the bottom of the pool or go feet first, then squat to grab the brick, both techniques allow you to put your feet to the ground and push up toward the surface of the water. Propel yourself up by doing this, then flutter kick until you break through the water’s surface.
4. Swim on Your Back
Many people find the test more difficult when swimming on their stomach or side while keeping the brick above water. Floating on your back, holding the brick to your chest and kicking, is a good strategy because it uses your body’s natural buoyancy to make swimming the brick back easier. Many swimmers recommend doing the kick used in the breaststroke, also known as the frog kick, because it's more powerful.
5. Avoid Submerging the Brick
As long as you get the brick back to the side of the pool without completely submerging it, you can keep it on the surface of the water. Keep this in mind because removing the brick entirely from the water takes a lot more energy and is much more difficult.
6. Use Both Hands for Stability
When you reach the side of the pool, stable yourself with one hand and use your dominant or stronger hand to place the brick on the side. Once you finish this, all you have to do is get out of the pool and complete the test.

Get the Lifeguard Training Equipment You Need From The Lifeguard Store
If you are ready to jump into action and help enforce water safety, get all the lifeguard training equipment you will need from The Lifeguard Store today. Find everything you need to prepare for the brick test, your certification and your first day on the job as a lifeguard.
At The Lifeguard Store, we take pride in having an abundant selection of new styles and colors at the best price. With low flat rates and free and speedy shipping, we want to ensure our customer's satisfaction. So, if you are looking for anything from swimwear to apparel, rescue equipment to guard accessories, check out the Lifeguard Shop for great products at a great value. Try our women's RISE Solid Poly Tri Color H-Back or our men's RISE Guard Splice Flex Board Shorts today!
Learn More About Lifeguard Skills and Training:


Leave a Comment
Your email address will not be published. Required fields are marked *